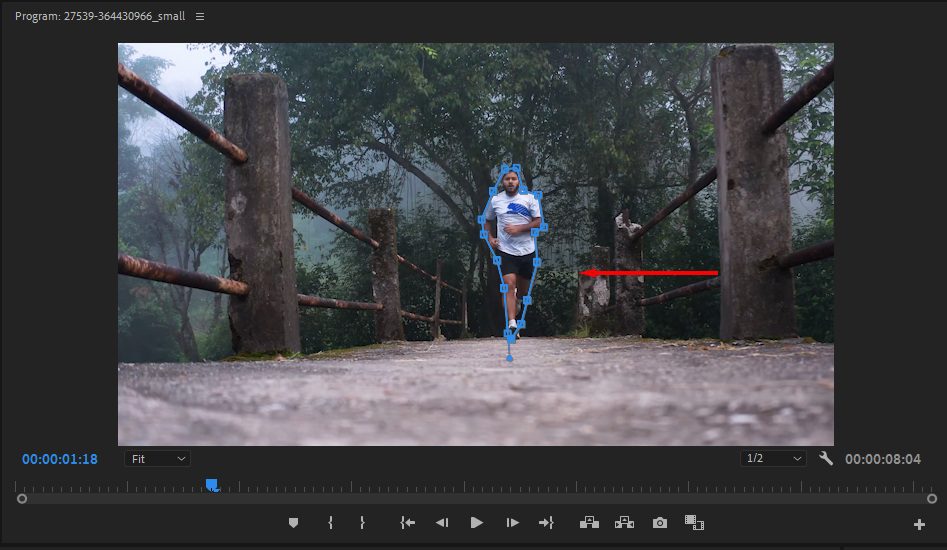
Masking is a game-changer in Adobe Premiere Pro, giving you the power to control exactly where and how you apply effects. When you know how to mask in Premiere Pro, you can blur faces, isolate colors, hide objects, and create seamless transitions.
In this article, you’ll learn all about masking in Premiere Pro and how to use this powerful technique to fine-tune your edits, make spot adjustments, and replace entire parts of your footage.
What is masking in Adobe Premiere Pro?
Masking is a technique that lets you apply effects, adjustments, or transparency to a specific part of a video clip. It allows you to hide or reveal parts of a layer, creating visual effects like blurring faces, color correction on specific areas, or creating picture-in-picture effects.
There are two primary ways to create masks in Premiere Pro:
- Opacity masks cut out part of a video or create a transparency effect.
- Effect masks apply an effect (like blur, color correction, or sharpening) to a selected area instead of the entire clip.
For example, say you’re editing an interview, and you need to blur a person’s face for privacy. Instead of applying a blur to the entire video, you can use masking to target just the face – the rest of the video stays sharp.
How to mask in Premiere Pro
Here’s how to create a mask in Premiere Pro:
1. Import your video clip
Open Adobe Premiere Pro and start a new project. Import your video file by dragging it into the Project Panel, then drag it to the Timeline to start editing.
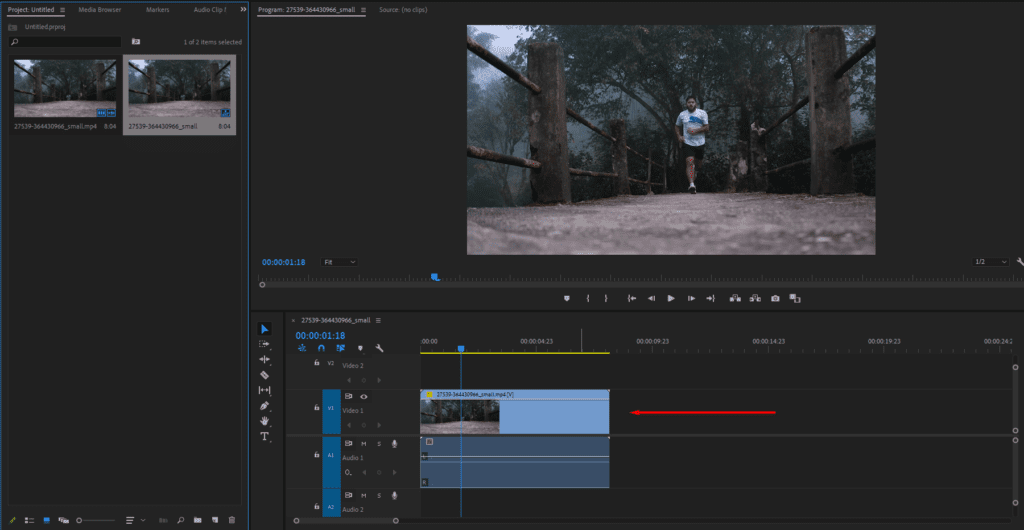
2. Access the masking tools
Next, click on your video clip in the Timeline to select it. Then, go to the Effect Controls Panel. If you want to create an opacity mask (to cut out an area), expand the Opacity section. If you want to create an effect mask instead, apply that effect (e.g., Gaussian Blur, Lumetri Color, etc.).
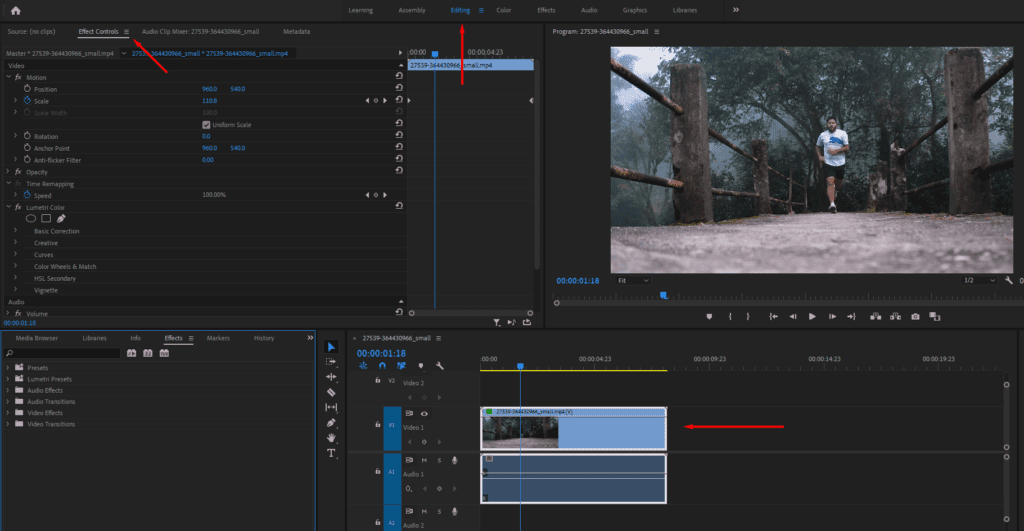
3. Create a mask
Under the Opacity or Effect Controls Panel, you’ll find three masking tools:
- Ellipse tool: Creates a circular or oval mask.
- Rectangle tool: Creates a square or rectangular mask.
- Pen tool: Lets you draw a custom mask.
Choose whichever mask shape is best for you, then adjust it by dragging the edges in your video preview. Use the Feather, Opacity, and Expansion settings in the Effect Controls window to refine the edges of the mask.
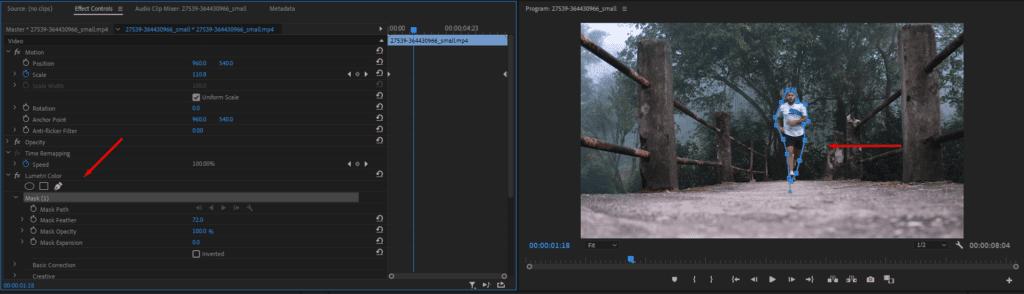
4. Adjust the effects inside the mask
Once you’ve created a mask, you can apply effects only within the masked area.
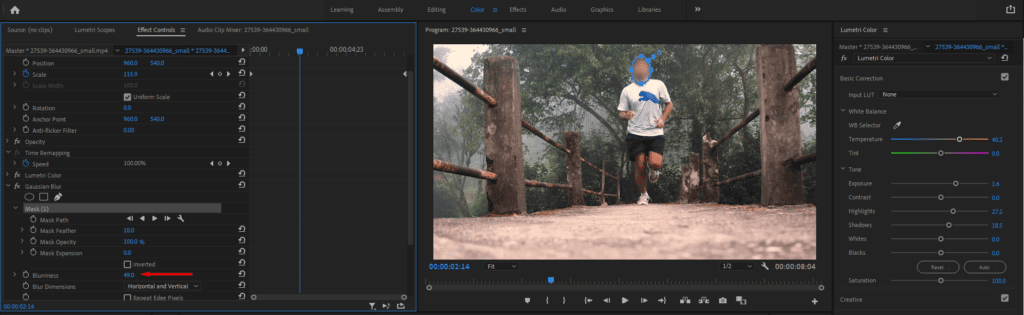
For example, to blur a face, apply the Gaussian Blur effect, increase the blur amount, then place the mask over the face.
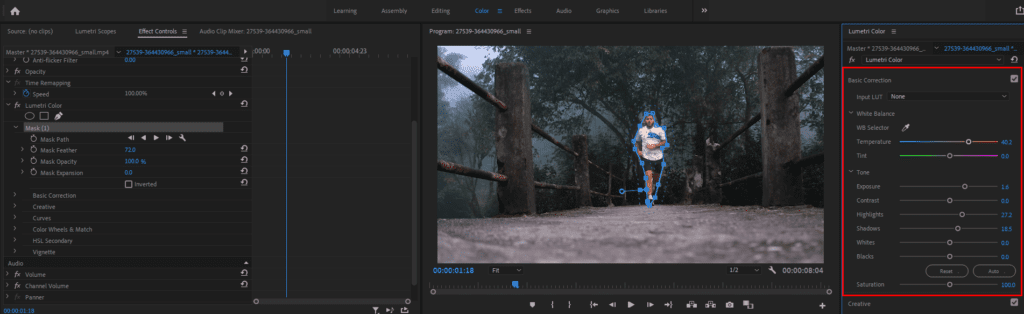
To adjust colors in a specific area, apply Lumetri Color, then mask the area you want to edit and make your color grading adjustments.
5. Track the mask to follow moving objects (optional)
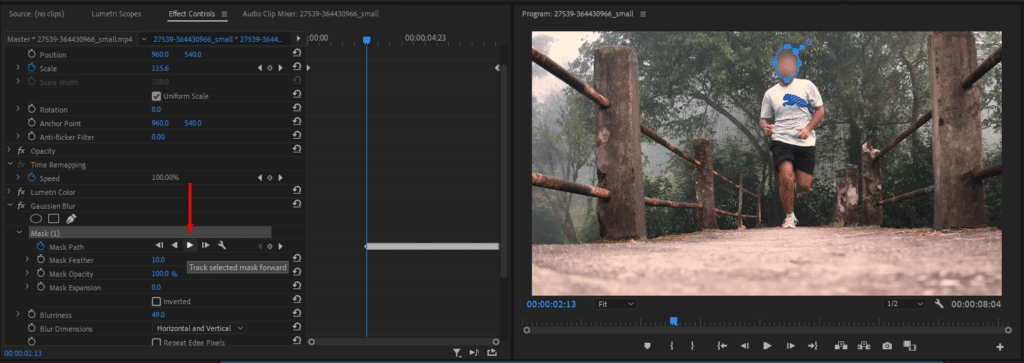
If your masked area is moving, you need to track it. In Effect Controls, under Mask Path, choose Track Forward to automatically follow the movement. If Premiere Pro’s tracking is inaccurate, you can manually adjust the mask frame by frame.
6. Replace the masked area with other footage (optional)
If you want to replace the masked part of your footage with another video or image, place the second video or image on the track below the masked clip in your Timeline and select Inverted in the Mask options. The masked area will now show the footage from the lower track.
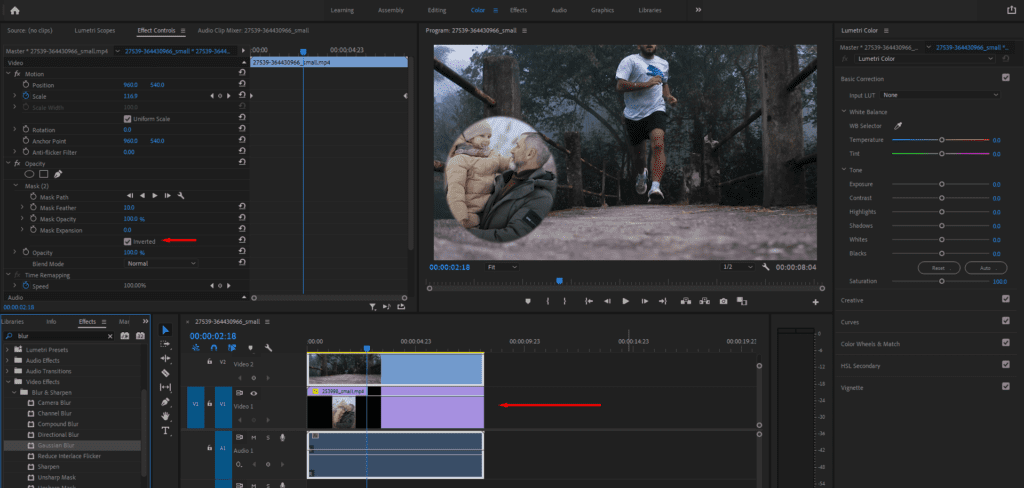
This is also how to mask out an object in Premiere Pro. Simply replace the masked footage with a “clean plate”—footage that matches the shot but doesn’t feature the object.
5 ways to use masks in Premiere Pro
Whether you’re looking to modify colors, obscure unwanted elements, or create unique effects, masks can help. With masks, you can place video inside text, layer text behind objects, and create attractive gradient overlays – and that’s not all.
Here are five more practical ways to use masks in Premiere Pro.
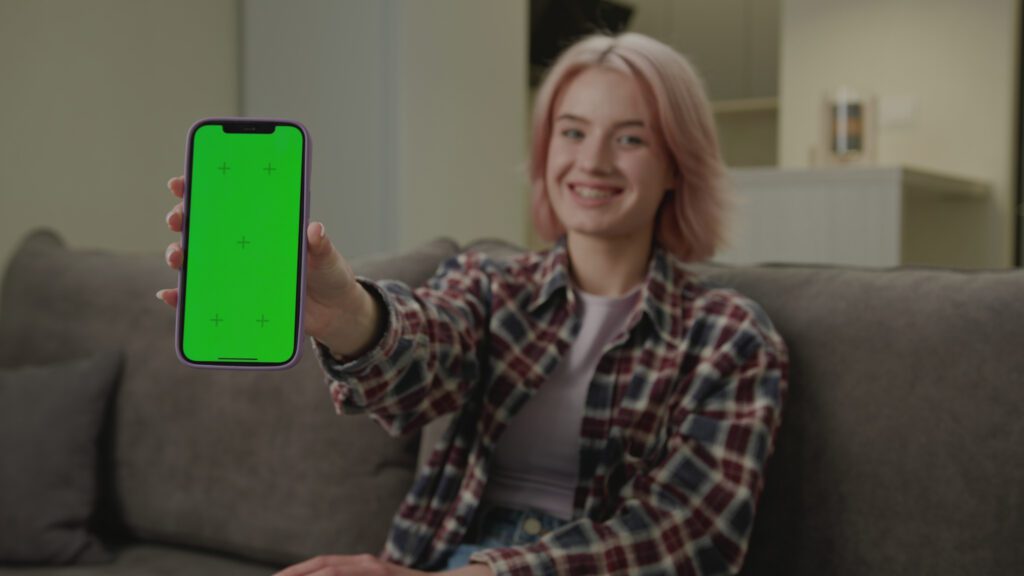
1. Replace screens on phones or computers
Replacing screens makes it look like a TV, phone, or laptop is displaying a different video or image. Create a mask around the screen using the Pen Tool, then place a new video or image on a track below, and adjust the perspective using the Corner Pin or Motion settings.
2. Apply selective color grading
Masks let you adjust colors in a specific area, rather than the global adjustments you can make with adjustment layers. Apply your Lumetri Color effects, create a mask around the area you want to adjust, and then feather the mask for a smooth blend with the background.
3. Block out logos or copyrighted products
Blocking out logos or products prevents unwanted branding or legal issues. Apply a Blur or Mosaic effect, mask over the logo using the Ellipse or Pen Tool, feather the mask for a natural look, and use Mask Tracking if the object moves.
4. Blur faces for privacy or censorship
Blurring faces protects privacy or keeps subjects anonymous. Apply a Gaussian Blur effect, draw a mask around the face, and click Track Forward to follow any movement.
5. Isolate a subject
Draw attention to a specific person or object by darkening or desaturating the background. Create a mask around the subject using the Ellipse Tool, apply Lumetri Color to the background, and then lower the exposure or saturation of the mask.
Note: If you’re getting into serious effects or working with green screen animations, you’ve probably heard of Adobe After Effects. Learn how to create masks in After Effects to improve your editing workflow.
Work faster in Premiere with the Storyblocks plugin
Knowing how to mask in Premiere Pro gives you a powerful tool for precise editing and creative effects. Whether you’re blurring faces, enhancing specific areas, or replacing objects, mastering masks will take your video editing skills to the next level.
If you want to enhance your editing workflow, try Storyblocks’ Creative Cloud plugin. Paired with a Storyblocks subscription, our plugin gives you direct access to library of over 10 million Premiere Pro templates, high-quality stock footage, music tracks, images, and more. Sign up for Storyblocks today and get everything you need to bring your creative vision to life.


