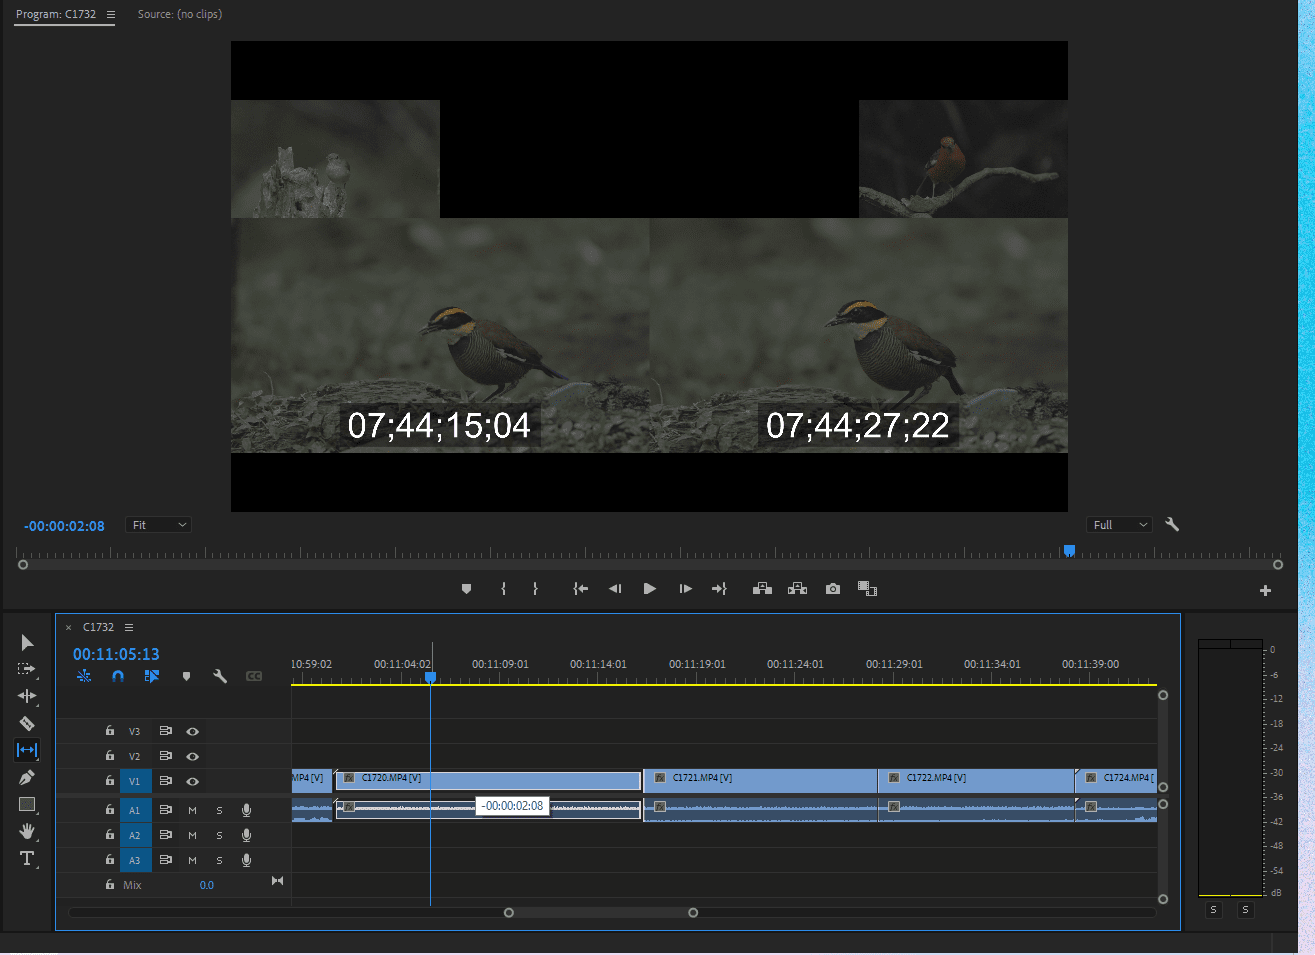
To improve your editing skills and create professional projects, you need to master all of the tools at your disposal. In Adobe Premiere Pro, the Slip tool stands out as a powerful feature that’s often overlooked, helping you edit your clips with greater accuracy.
In this article, we’ll explore how the Slip tool works and explain how it can enhance your editing skills and help you produce polished videos.
What does the slip tool do in Premiere Pro?
The Premiere Pro Slip tool helps you fine-tune the timing of a clip in a sequence without altering the duration of the edit. It lets you adjust the in and out points of a clip at the same time, so the content of the clip shifts in time within the same duration and position in the timeline.
In other words, it’ll keep the clip on your timeline the same size and length, but it’ll change which part of the clip you see.
Imagine you have a 30-minute clip of someone walking from one point to another. You’ve placed one minute of that clip in the sequence, but you feel like the start and end could capture the action a bit better. With the Slip tool, you can adjust the timing to feature the best part of the 30-minute clip while keeping the clip’s position unchanged.
How to use the Slip tool in Premiere Pro
Here’s how to use the Slip tool to change a clip’s in and out points:
1. Select the Slip tool
First, select the Slip tool in the toolbar or press the keyboard shortcut “Y”.
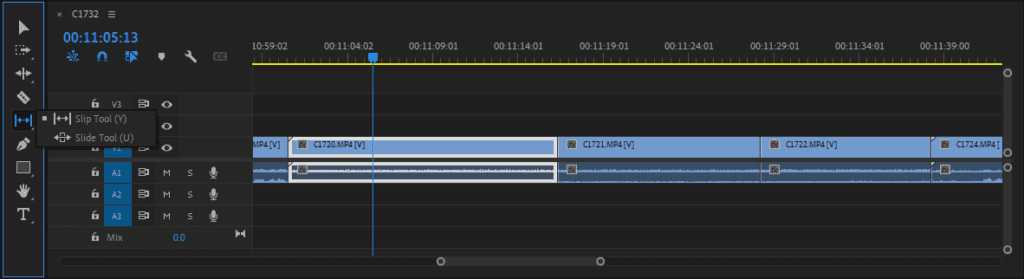
2. Change your clip’s in and out points
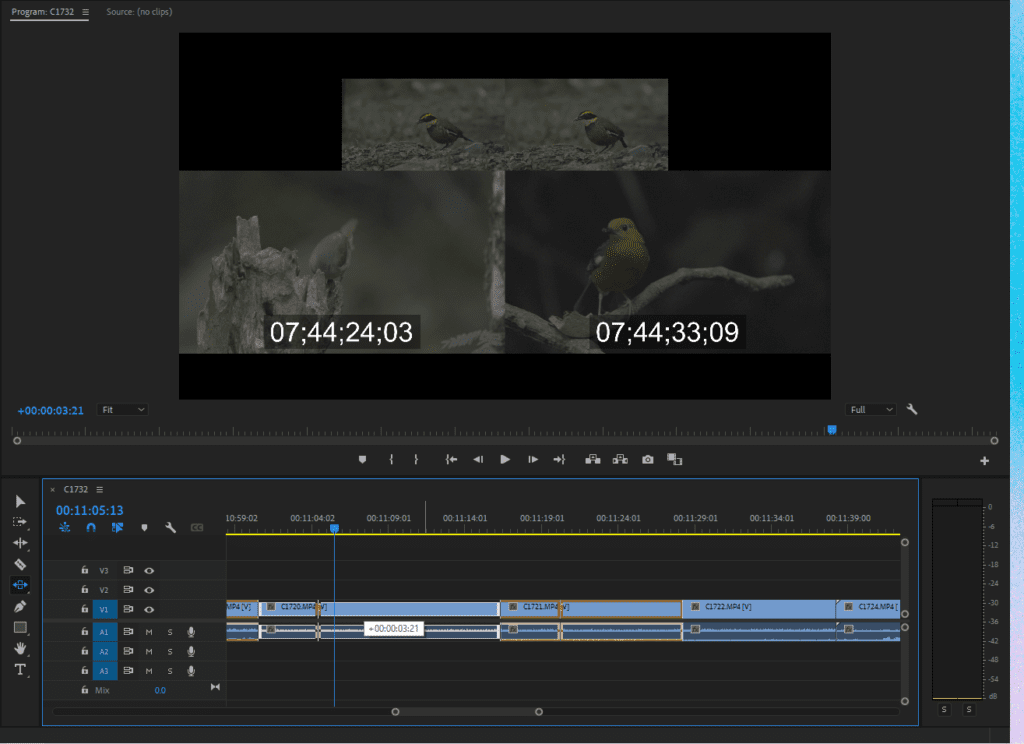
Next, click and drag on the clip you want to slip in the timeline. Drag left to move to an earlier point in the clip and right to move to a later point.
As you drag, Premiere Pro will show you a 4-up display of the new start and end frames of the clip. The two frames on the left show the last frame of the preceding clip and the first frame of your slipped clip, while the two frames on the right show the last frame of your slipped clip and the first frame of the following clip.
When you’re happy with the position of your clip, release the mouse button.
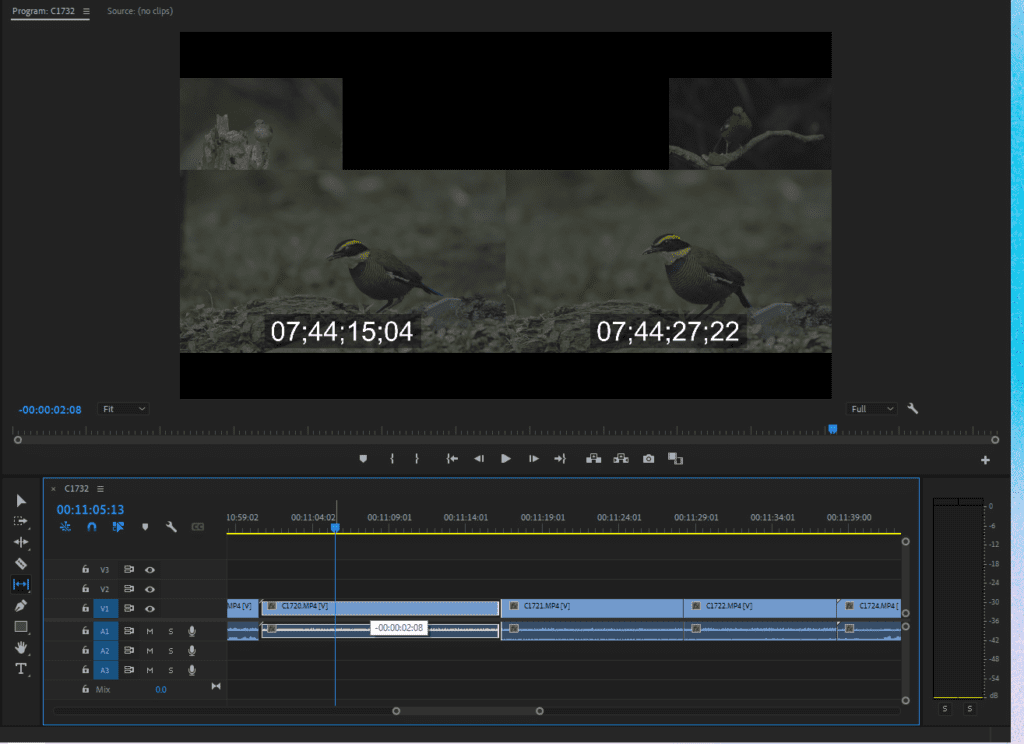
Note: You can also use keyboard shortcuts to move your clip by a few frames in either direction. To move the clip by five frames in either direction, press Ctrl + Alt + Shift + Left/Right on Windows (or Option + Shift + Command + Left/Right on Mac).
How to use the Slide tool in Premiere Pro
The Slide tool is another useful feature for adjusting clips, though it operates differently from the Slip tool. Instead of changing the in- and out-points of a clip, it lets you move a clip along the timeline, changing the clips around it.
It’s useful when you want to keep the content of a clip the same, but change its position relative to other clips. As you drag the clip through your timeline, the clips around it will shorten or extend to fill the gaps, keeping the total duration of the sequence the same.
Here’s how to use the Slide tool in Premiere Pro:
1. Select the Slide tool
First, select the Slide tool from the toolbar or press the shortcut key “U”.
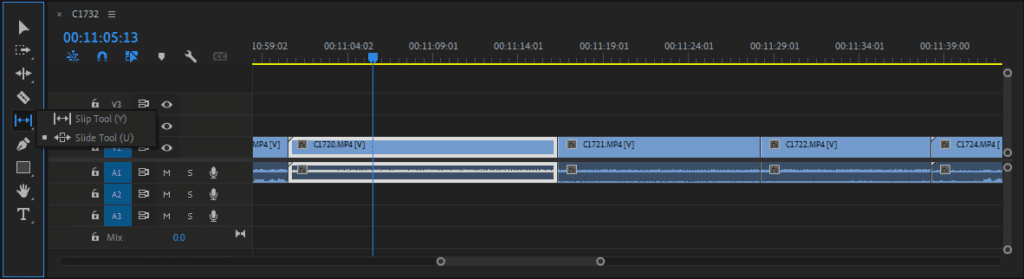
2. Change your clip’s position in the timeline
With the Slide tool selected, click and drag the clip you want to slide along the timeline. As you slide it, the in- and out-points of the adjacent clips will adjust accordingly.
As with the Slip tool, you’ll see a 4-up display. The two frames on the left show the last frame of the clip before the sliding clip and the new in-point of the slide, while the two frames on the right display the new out-point and the first frame of the subsequent clip.
Release your mouse button once you’re happy with the positioning.
Tips for using the Slip tool
Using the Slip and Slide tools in Premiere Pro can enhance your editing efficiency and precision once you get the hang of them. Here are some video editing tips to keep in mind when using these tools:
- Check clip handles. Make sure that your clips have enough “handles” or extra footage on either side to allow for slipping. With smaller handles, you’ll only be able to make limited adjustments.
- Watch your audio sync. As you slide clips, you might desync the video from your audio. Be careful to maintain video sync with audio or other clips when sliding, especially in multi-camera setups.
- Use the Split tool to refine selections. Use the Split tool to isolate a clip section, then employ the Slip tool to refine its timing within your edit. This lets you focus on key moments without disrupting the rest of your timeline.
- Experiment and revert. Don’t be afraid to experiment with these tools. If things go wrong, remember that Control + Z (or Command + Z on Mac) undoes changes.
- Crop your clips for better transitions. Before fine-tuning your clip positions with the Slip and Slide tools, crop your video to focus on the most important visual elements. Once you’re happy with the crop, then you can perfect your sequence timing.
- Utilize the visual aids. Pay attention to the 4-up display in the Program Monitor. This helps you see precisely affected frames and ensures your edits align with the surrounding clips.
Conclusion
Mastering the Slip and Slide tools in Premiere Pro will improve your editing precision and workflow. By focusing on fine-tuning clip content and timing, you’ll easily achieve a more polished, professional look in your videos.
As you refine these skills, your edits will naturally become seamless and engaging. For an added boost, check out Storyblocks’ extensive library of Premiere Pro templates and resources. With a subscription, you can access unlimited, royalty-free stock footage, music, and more—perfect for elevating your creative projects! Sign up today to enhance your editing toolbox.


