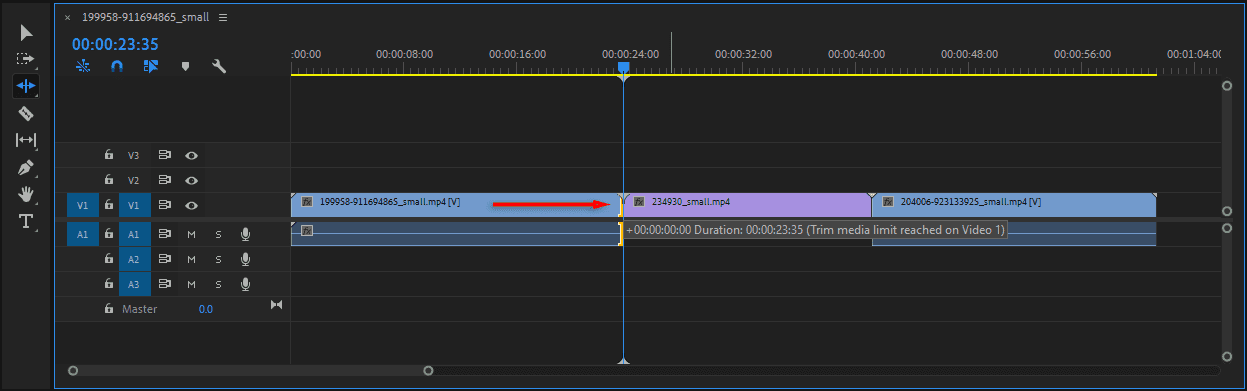
Video editing often eats up more hours than you’d like, even for seasoned pros. Luckily, there are always tools and techniques to cut down on small, time-consuming tasks—like Premiere Pro’s Ripple Edit Tool.
In this tutorial, we’ll explain what the Ripple Edit Tool is, how to master it, and how to pair it with other features in Premiere Pro to speed up your editing.
What is the Ripple Edit Tool?
The Ripple Edit Tool in Premiere Pro helps you adjust the length of a clip without changing the overall flow of your project. Imagine you’re editing a sequence of video clips, and you realize one clip is a bit too long or too short.
Here’s what the this tool does:
- Shorten or lengthen clips: When you use the Ripple Edit Tool, you can click or drag the start or end of a clip to change its length.
- Automatic adjustments: As you change the clip’s length, the tool automatically shifts the adjacent clips in the timeline. If you shorten the clip, it closes the gap by moving the next clip forward. If you lengthen it, it pushes the following clips further down the timeline to make room.
Think of it as a way to keep everything neatly aligned. Without this tool, you’d have to manually move all of the other clips to fill gaps or create space, which can be time-consuming and create problems in your timeline.
How to use the Ripple Edit Tool
Here’s a step-by-step guide on how to use the Ripple Edit Tool in Adobe Premiere Pro. In this section, we’ll explain how to find it, use the keyboard shortcut, and perform a ripple edit.
1. Open your project
Start by opening your project in Adobe Premiere Pro. Import some clips and make sure your timeline is visible so that you’re ready to start editing.
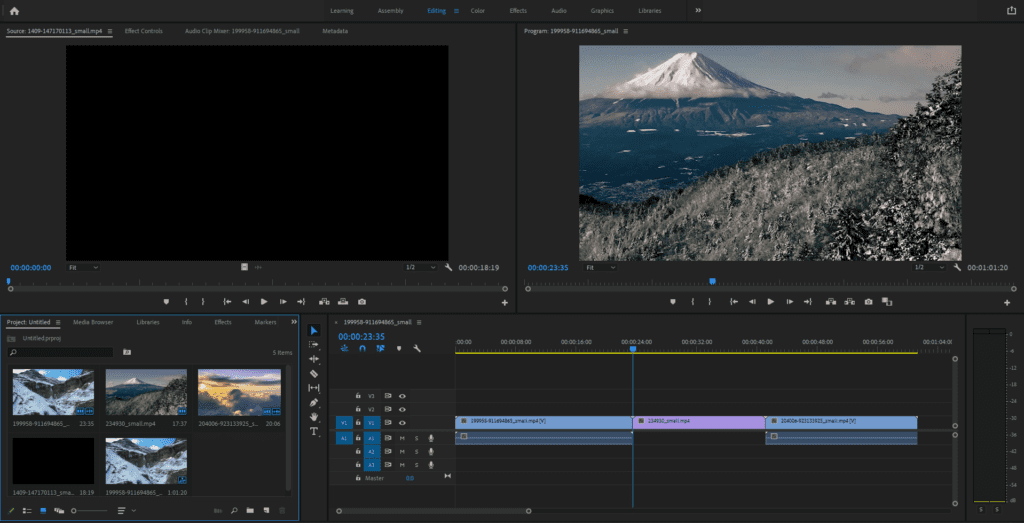
2. Select the Ripple Edit Tool
Next, select the Ripple Edit Tool in the toolbar on the left-hand side of your timeline. It looks like a small arrow with a vertical line.
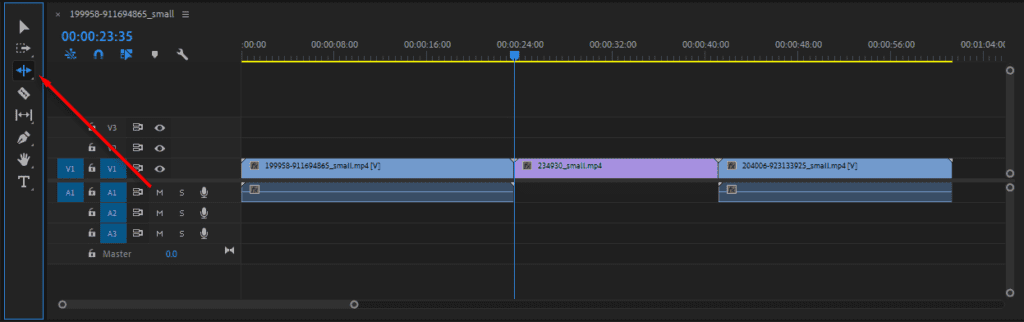
Instead of manually selecting the tool, you can press B on your keyboard—this is the Ripple Edit Tool Premiere Pro shortcut.
3. Make the ripple edit
Decide which clip you want to edit and make sure there’s enough footage before or after the clip if you’re lengthening it. Then, hover over the start or end of the clip. You’ll see the cursor change to the ripple edit icon (the bracket with an arrow through it).
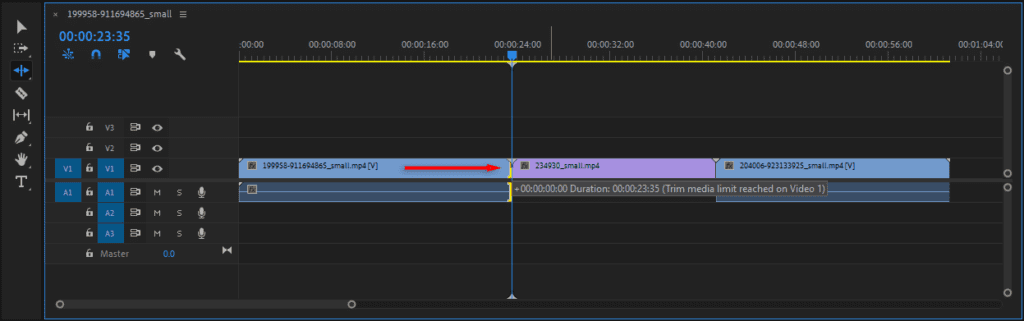
- To shorten the clip: Click and drag toward the center of the clip.
- To lengthen the clip: Click and drag away from the center of the clip.
As you drag, notice that the following clips move to fill the gap or make space, keeping everything synchronized.
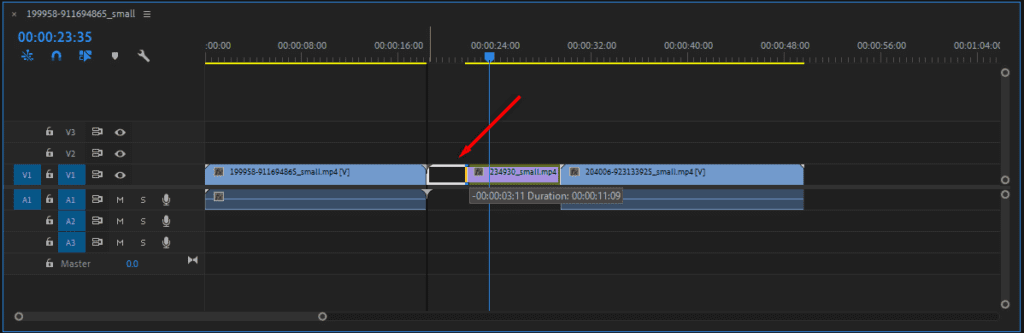
Play the timeline to make sure the transition between clips is smooth and the timing feels right. Adjust it further if needed.
What to do if the Ripple Edit Tool isn’t working
If you’re finding that the tool isn’t behaving as expected, don’t worry. There are a few reasons why, and they’re usually easy to fix. Here’s what could be going wrong and how to troubleshoot the issues:
- You’ve synchronized multiple tracks. If you have multiple tracks synchronized, the Ripple Edit Tool might not work because changes on one track can disrupt the sync. To fix this, check that your tracks aren’t linked or grouped together. You may need to temporarily unlink them to make a ripple edit.
- You haven’t linked your media. If your audio or video aren’t linked, the ripple edit might only affect one of them. Link your audio and video by selecting the clip, right-clicking, and pressing Link.
- You aren’t starting at the edge of the clip. The Ripple Edit Tool only works at the beginning or end of a clip. If you’re trying to use it in the middle, it won’t activate. Make sure your cursor is right at the edge of a clip before attempting to drag it.
- You’ve disabled sync lock. If you’ve turned off sync lock, edits on one track won’t impact others, and they might become misaligned. Turn sync lock on by pressing the small chain link icon at the start of each track in the timeline.
- You haven’t selected the track. Sometimes, only active tracks respond to edits. Make sure to select the target track before using the tool.
How to use the ripple delete tool
Unlike the Ripple Edit Tool, the ripple delete function isn’t a tool you select like others in the toolbar. Instead, it’s a command you use to quickly delete clips or gaps and automatically close spaces in your timeline. Here’s how to ripple delete in Premiere Pro:
1. Open your project
First, open your project in Premiere Pro and bring up the timeline with the sequence you want to edit.
2. Use ripple delete to remove the gap or section
Right-click the area you want to remove (either the clip or gap) and select Ripple delete from the context menu.
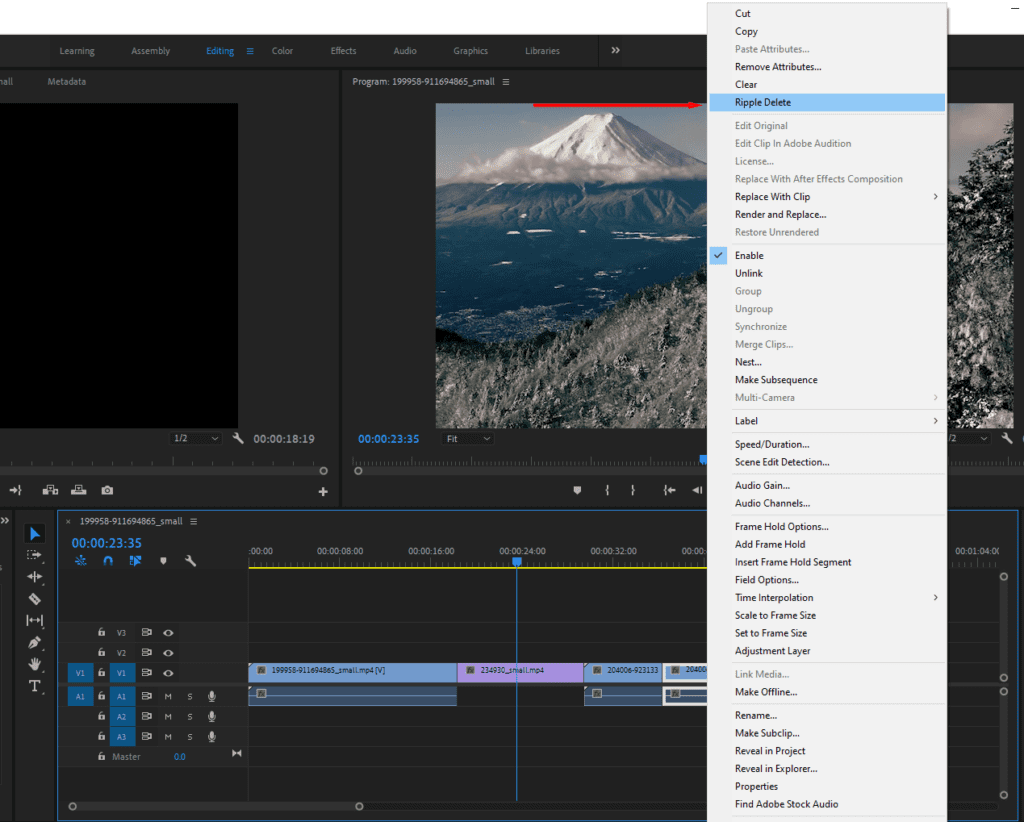
If there’s a gap, simply right-click it and Premiere Pro will automatically highlight it. If it’s part of a clip you want to remove, cut either side of the section, then right-click the unselected section and press Ripple delete.

Alternatively, you can use the ripple delete shortcut in Premiere—Shift + Delete. First, select the clip or gap, then press Shift + Delete to ripple delete it.
Why can’t I ripple delete in Premiere Pro?
There are two main reasons why ripple delete stops working in Premiere Pro: You’ve either selected the wrong track, or another track is blocking the ripple delete.
Make sure you’ve selected the right clip (or gap)—if you’ve highlighted more than one, the ripple delete function might not work properly. If you’re trying to remove a section of a clip, you’ll need to split the clip first.
If another track, like your audio track, is synced with the track you’re trying to ripple delete, it’ll block it. Use the Cut tool to cut either side of that track in the same places, or uncheck the Sync Lock on the track. Just remember that desyncing your track will put your audio track out of sync.
Tips for getting the most out of using the ripple tools
Here are some pro editing tips you can apply to use the ripple tools more effectively:
- Combine both tools. After using ripple delete to remove unwanted clips, use the Ripple Edit Tool to fine-tune the transitions between clips.
- Lock unaffected tracks. When using ripple edit or ripple delete, lock any tracks you don’t want to change to prevent accidental shifts that could disrupt your timeline.
- Use snapping. Enable snapping (by pressing S) to help align clips precisely when using ripple edits. This will ensure that your clips start and end exactly where you want them to.
- Preview changes. After a ripple adjustment, quickly play through the affected area to check that transitions are smooth and everything is in the correct place. This will help you catch and correct errors right away, before they’re blown out of proportion.
Conclusion
Now that you’ve got the hang of the Ripple Edit Tool, why not explore more features in Premiere Pro with our other step-by-step tutorials? Become a color grading expert, master the slip tool, create captivating text effects, and more.
To edit even faster, consider using pre-made, customizable templates. These allow you to easily add advanced effects and motion graphics, giving your videos a polished, professional look. Sign up for Storyblocks today and choose from thousands of templates tailor-made for Premiere Pro.


